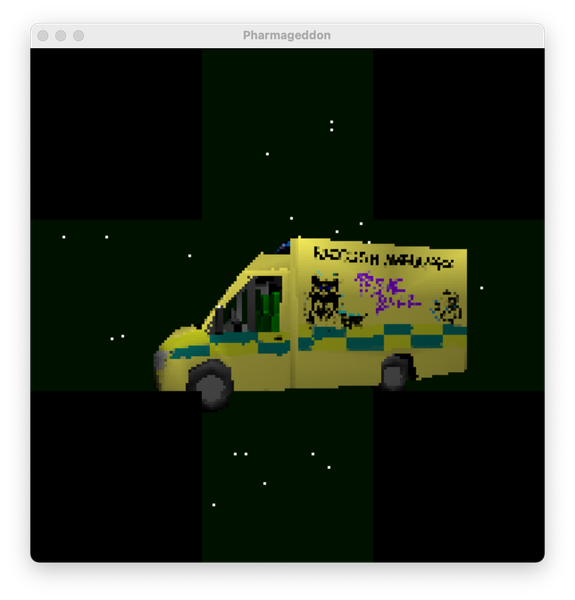
Pharmageddon
This weekend at the TRSAC demo party in Aarhus, Denmark, a merry band of hackers known as The Paramedics presented Pharmageddon, a demo for a pharmacy LED sign.
The background
Over the summer, a couple of viral videos of over-the-top pharmacy sign animations were doing the rounds:
One of my fav TikTok things is people discovering the insane VJ’s we employ for our pharmacies in Europe pic.twitter.com/1RKTgIkx1R
— flo veltman (@FlorianVltmn) August 14, 2022
Naturally, this piqued the interest of quite a few people on the demo scene, including the Spanish group ThePetsMode who released PharMaSX, an MSX tribute to the phenomenon. A few folks on the Field-FX Discord were toying with the idea of getting hold of one of these signs to hack on, only to find that they were going for £2000+ on eBay. At this point, I was thoroughly nerd-sniped... I had a glut of 64x64 LED panels lying around from building a display for my Speczilla project, and from my experience of getting them running from a Raspberry Pi I was confident I could make my own for a fraction of that cost, and make it full RGB and more than double the resolution too. And, one evening of hacking later, I had a working sign ready to write a demo on.
So, how exactly do you build a replica pharmacy sign...?
The hardware
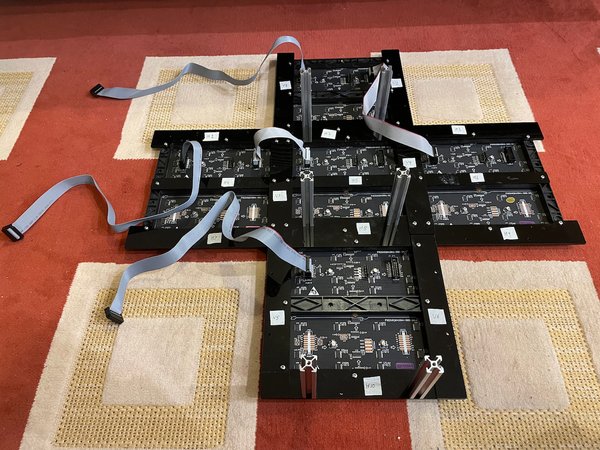
First, you'll need five 64x64px LED matrix panels. The 3mm pitch ones I used can be picked up on AliExpress for under £15 a piece (although delivery costs will probably double that) - I ordered from Shenzhen Coreman Technology and XuYang LedDisplay Module Controller Store. Unfortunately the world of LED display suppliers seems to be lacking in standardisation, and it's entirely possible that even if you order the exact same product it'll have different mounting holes or addressing modes than mine, so be prepared to adapt these instructions. If the PCB is marked "P3(2121)64X64-32S-M5.1", it's hopefully the exact same one as mine.
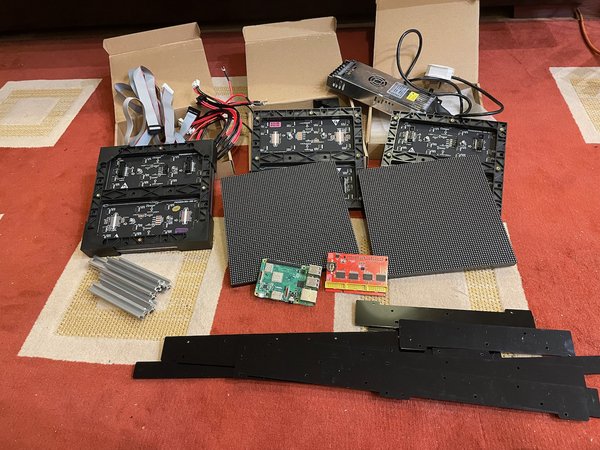
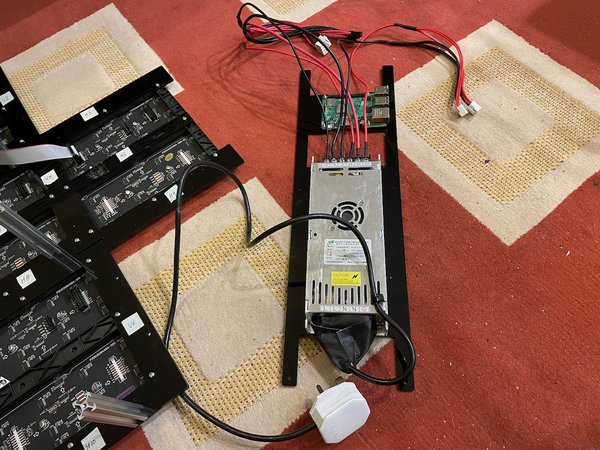
You'll also need a power supply - this 300W one will cover the power demands for all five displays. It provides three 5V lines, and since each power cable has connectors for two panels, that gives you enough connectors with one to spare.
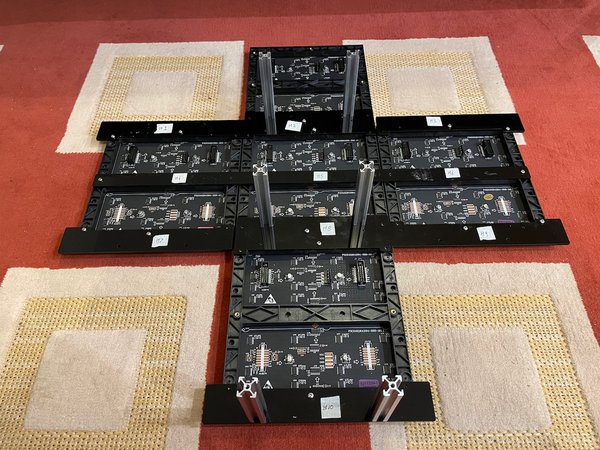
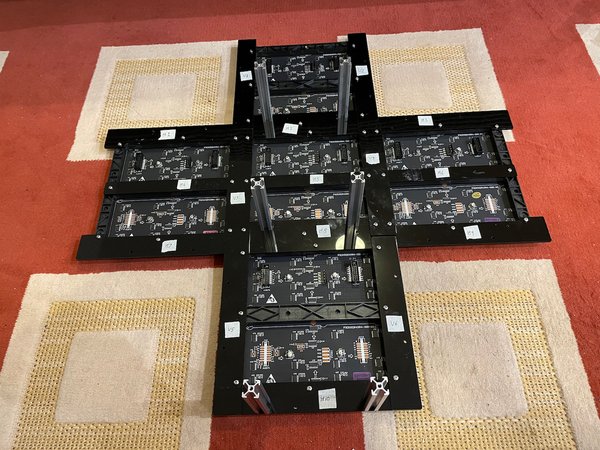
I previously learned the hard way that LED panels don't really like being load-bearing elements, so I designed some laser-cut acrylic brackets to form the structure, matching the mounting screw holes on the panels and with some extra mounting holes for some extruded aluminium profile so that it could stand upright.
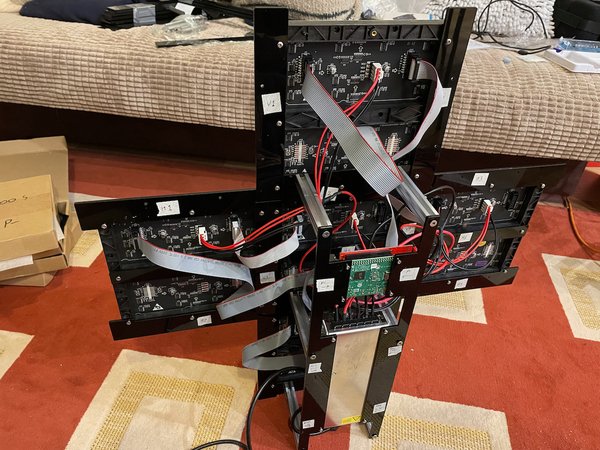
As previously mentioned, the brains of the whole operation was a Raspberry Pi, relying heavily on Henner Zeller's rpi-rgb-led-matrix library. I used a Raspberry Pi 3, but other models will work too, as detailed in that project's readme.
I used Electrodragon's three-port driver board - in principle you can chain panels off one port to any length, but the refresh rate will suffer accordingly. With three ports, you only need to chain up to two panels, which gives a solid 100Hz refresh rate. To get the board to work with my 64x64 panels, I had to solder the jumper P4 to ground and P8 to E - this may differ for your boards, so be sure to test against the rpi-rgb-led-matrix examples before committing with the soldering iron.
The shape of the display means that inevitably the panels have to be chained in a slightly oddball way - looking at the back of the panels and counting them as 1 (top), 2, 3, 4 (middle), 5 (bottom), I connected the 'Top' port to 1 then 4, the 'Middle' port to 2 then 3, and the 'Bottom' port to 5. You'll need a bunch of 30-50cm IDC ribbon cables for this - the standard 15cm ones that come with the panels won't cut it here.
One last niggly detail is that the rpi-rgb-led-matrix library has to commandeer one of the Raspberry Pi's timing circuits that's normally used for the on-board audio, so you'll need a USB audio dongle instead.
And that's about it for the hardware side - all that remains is the small matter of writing a demo for it...
The software
To simplify the programming (and allow building a straightforward SDL2-based simulator for developing on normal screens), all the graphical effects were written to a 192x192x32-bit buffer in memory, with the visible portions of it being pushed to the rpi-rgb-led-matrix library's drawing functions a pixel at a time. Probably not the most efficient way of shifting the data around, but given the amount of pixel-pushing and bit-banging on either side of that pipeline, and the fact that 20480 pixels isn't really very much in this day and age, it's definitely not the bottleneck. Incidentally, the LED driver code borrows one of the Raspberry Pi's CPU cores, leaving the other three free for our own purposes and ensuring that we didn't have to worry about the refresh rate dropping for the more challenging parts.
Superogue handily had some integer-based line / circle / triangle drawing routines left over from a previous project, which were a great help in getting the visuals off the ground. In theory it should have been possible to use OpenGL, given the appropriate incantations to render to an in-memory buffer - but after a couple of thankless weeks failing to get an OpenGL "hello world" example working from the same code across both the Raspberry Pi and SDL on a "proper" computer, I had to admit defeat and take the nuclear option of writing a software 3D engine from scratch instead. I'm sure there are demosceners out there who would relish that sort of "where is my triangle" troubleshooting challenge, but it's well outside my comfort zone. So is writing a software 3D engine, for that matter. But at least I knew the rough theory behind it, and could gradually zero in on something that more or less held up as long as I didn't do anything too advanced (like, um, objects going behind the camera). The final result isn't going to rival the Unreal Engines or Unities of this world, but it does support simple diffuse lighting, textures, and loading models with Assimp, which was enough to bring RaccoonViolet's 3D creations to life.
Elsewhere in the demo, Stormcaller contributed video visualisations created in Lumen, which were played back using the tiny-but-perfectly-formed pl_mpeg library, and Superogue and Nico provided some classic 2D (and pseudo-3D) effects. All of this was wrapped up in a soundtrack created by TôBach in Renoise, with liberal use of the Delay Lama plugin.
The demoscene has a long-running laundry list of things that have been systematically ported to every platform under the sun, and a certain portion of the audience would never have forgiven us for not delivering a Bad Apple, Patarty or Farjan. The "30 seconds of demoscene memes" section was a tactical ploy to do exactly that without letting the entire demo be consumed by it - after all, I did want it to stand on its own as a demo, not just a rehash of older ones... Most of these scenes were quick hacks with our 2D drawing routines, but we did at least do the STNICCC 2000 port properly, parsing the polygon stream format from the original demo data file.
The full source code is up on Github, and once you've set up Assimp, SDL2, and SDL_Mixer - and placed rpi-rgb-led-matrix alongside the repo if you're building it for the real hardware rather than the simulator - it should be reasonably trouble-free to compile. Have fun!